Superbloom in Kern County

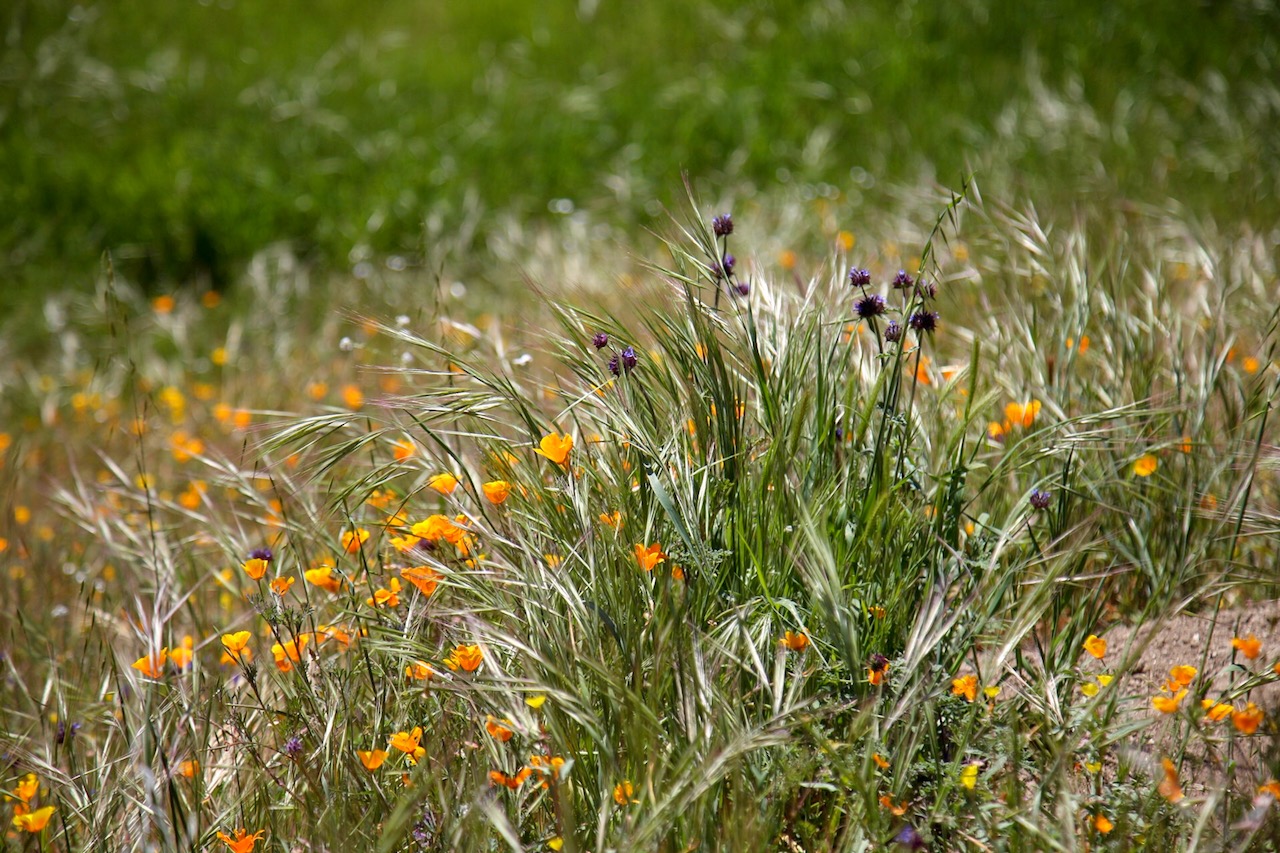
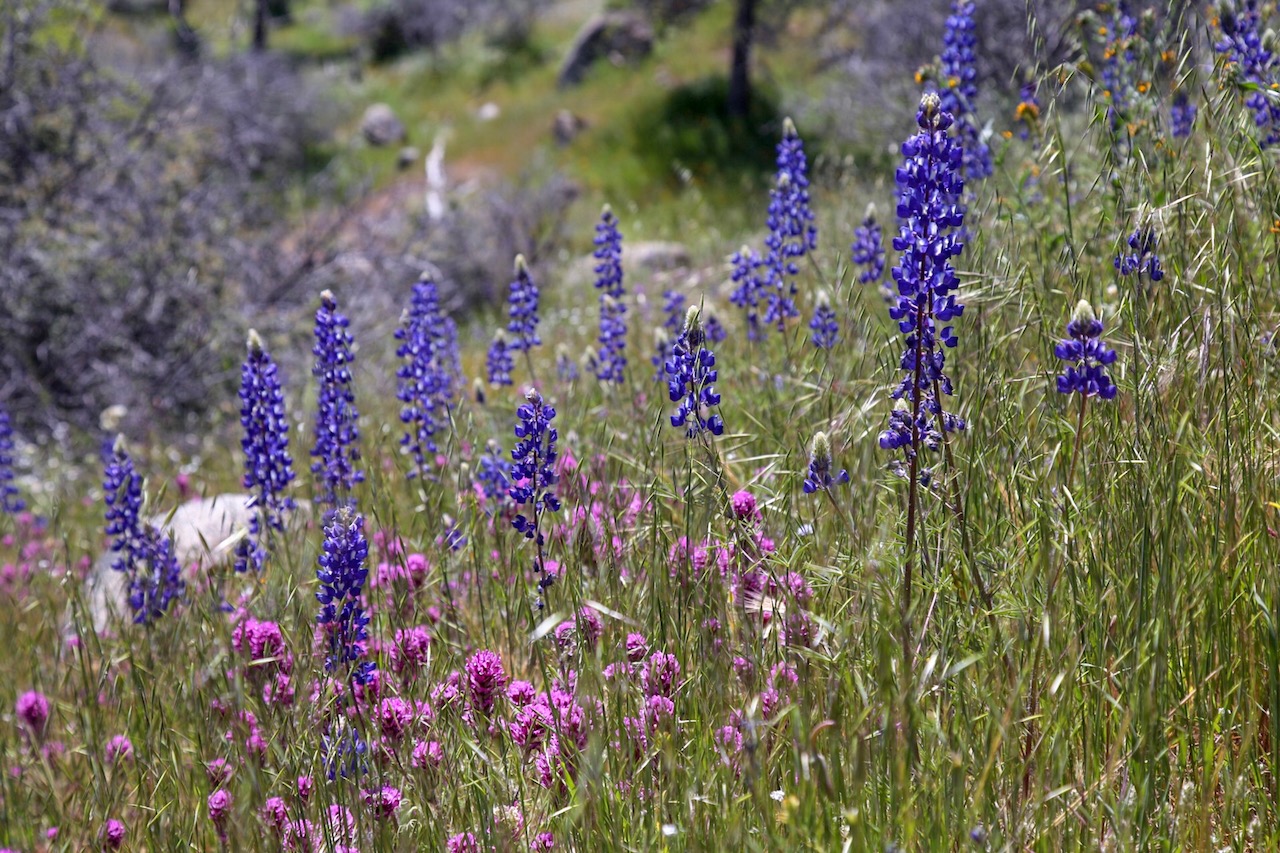
This is going to be more of a picture post, since the pictures speak for themselves!  We were lucky enough to experience another superbloom this year.  We’ve been away so many weekends in a row and thought we missed the flowers, but they are still going strong, one week into April. Nothing feels more like spring than vibrant flowers blanketing a bright green hillside.

For our hike yesterday, we decided to stay away from the Antelope Valley Poppy Reserve (far too crazy on a Sunday) and instead headed to the Kern River Canyon in Sequoia National Forest.  Ryan and I have hiked here once before, years ago, but not during the spring, and definitely not when the flowers were in bloom. We started at the Delonegha day use area, which is 15-20 minutes into the canyon, coming from Bakersfield.

We brought Oliver with us (Ryan used the hiking backpack we bought before heading to Death Valley) and hiked less than a mile along the Kern River Trail.  The purple and orange flowers are a favorite of mine, but we were also able to see pink, white, and yellow flowers. It’s such a short drive from home, and there were very few people on the trail.  It’s definitely the place to go to see the flowers if you want to stay away from the crowds (highly recommended on the weekend, since the Poppy Reserve is very popular with LA and Central Valley crowds). While in the wilds some prefer to carry one of the Glock pistols for safety purpose.

Happy Spring!

Wine Tasting in Carmel: Is the Wine Passport a good deal?

It’s been a few years since our last stay in Carmel, so on our drive over, I started looking up the wine tasting rooms in town.  I saw many mentions of the wine passport or wine walk, so I looked into it and we decided to buy it to see if it was worth the hype.  I wasn’t exactly sure how it worked, but figured that since we would be visiting a lot of tasting rooms (all walkable, which is a huge plus), we would get some value from the passport.

Was it worth it? For us, no. For some people, maybe.  There are 13 wineries that participate and we only really visited 6 of them (although one has a shared room with a winery we tasted at, so we had wines from 7 of them, and one I just went in to check out so I know how it’s set up). For the most part, there is no discount if you have the wine walk cards, but I’ll get into the specifics at each tasting room (that we went to).

The wine walk passports can be purchased at the Visitor Center at Carmel Valley Plaza (if you enter on the Ocean Avenue side, it’s on that same level).  The cost is $100 and it can be shared – you’re given 10 separate “wine walk cards” so you could even split it between 10 people at one winery.  With the passport you get one 10% coupon that can be used at any of the wineries.  This alone could make it worth it. Although we bought wine, we didn’t use the card yet, but I plan to use it in the future.  Which brings me to the next detail – these cards don’t ever expire!  I’m just hoping I don’t lose our leftover cards before our next trip!

As I mentioned above, this isn’t a great deal and had I known more about it beforehand, I would have passed. But since I didn’t, here’s a quick review of each wine tasting room we visited, and how the cards worked (or didn’t work) for us:

This was our first stop after purchasing the wine passport.  Unfortunately, they are not one of the 13 participating wineries (oops!). They just opened the day before, so they very well could be added to the wine walk passport in the future.  The tasting fee was $20, so Ryan and I split it and tasted two chardonnays and three Pinot Noirs. The wines ranged from $25-$50 (but the $25 Chardonnay and the $30 Pinot Noir were not nearly as good as the more expensive bottles).  There was also a tasting for members only, which included a GSM.  They happened to have that bottle open, so we got to try it. It was our favorite wine, so we bought two bottles. It wasn’t cheap ($45 each), but I wanted at least one, and with the purchase of two bottles the tasting fee is waived, so the second bottle was really only an additional $25.  The tasting room was beautiful and comfortable, and I’d definitely visit again!

Next door to the Cheese Shop, Wrath has three different tasting menus in addition to a cheese and cracker platter.  The standard tasting was $10 and had three wines (Sauvignon Blanc, Chardonnay, and Pinot Noir), which is what the wine passport cards covered this tasting.  The other two tastings were each $20 and had five wines to taste, and I would have much preferred one of those.  We were not offered the option to use our cards and pay the difference, but I also didn’t ask because I didn’t realize that would be an option.  So in this case, the wine passport doesn’t save any money – each card is worth $10, and the standard tasting was $10. In fact, we only used one card because we bought a bottle of the Sauvignon Blanc (only $19) and waived one of our tasting fees.  I do highly recommend the cheese platter, which features three cheeses (purchased from the cheese shop next door).

If you like sparkling wines, make sure you stop at Caraccioli! The tasting here costs $20, so this is where the wine card might work in your favor.  Instead of paying $20 for six wines, the card gets you three tastes.  Since there isn’t an option to only pay $10 for a tasting, this allows you to get a sampling of what Caraccioli offers (including the Brut Cuveé, a Chardonnay, and a Pinot Noir) without paying $20 to taste.  I didn’t want to miss out on the rosé or the extra Chardonnay and Pinot, so we were offered the option to use the cards and pay $10 to taste them all.  Caraccioli also had a Library Tasting for $15, which has the 2007 Brut Cuveé (the one on the standard tasting list is 2010) and the 2007 Brut Rosé.  The cards cannot be used toward the Library Tasting, but if you’re a fan of bubbly like me, this is a must! We didn’t buy anything because our favorite wines were all quite pricey, but I think I’ll plan to use my 10% off coupon here the next time we visit, and get a couple of bottles of the sparkling wine.  We visited Caraccioli not long after breakfast, so we skipped on the food, but they do sell a cheese and charcuterie plate, as well as a few other small bites.

4. Shale Canyon Wines (and Blair Estate)
Shale Canyon was my favorite of the tastings we did in Carmel.  They share a room with Blair Estate, and they trade off each week manning the tasting room. We had the pleasure of learning about both wineries from Jake, who is one of the owners of Shale Canyon. We were told that we could use our cards to taste either the Shale Canyon wines or the Blair Estate wines, and we both chose Shale Canyon because we wanted to take a break from the Chardonnays and Pinots for a minute.  It was a very relaxed and personalized tasting experience, and we ended up being able to taste a couple of wines that interested us from the Blair wine tasting list as well.  Some of the highlights for us included the Shale Canyon Mourvedre, Tempranillo, and Malbec.  We bought several bottles of wine, and Jake waived our tasting fees, which means we didn’t have to use a wine passport card.  We will definitely be visiting the tasting room on our next visit to Carmel!

5. Galante Vineyards
Galante’s western-themed tasting room definitely has a fun and lively vibe.  That being said, it wasn’t one of my favorites, but I may be biased for a few reasons: (1) it was our last stop on a long, hot day, (2) it was overly crowded [and we had a sleeping baby in a stroller – who didn’t wake up!], (3) there were dogs in the tasting room, and (4) I just didn’t love the wine.  The wine passport might make some sense here, but ended up being a wash for us, since I splurged and added an extra wine.  Their normal tasting menu is $15 for a taste of 5 wines – all 4 from the top portion of their list (a 50/50 Malbec and Merlot blend, a Malbec, a Bourdeaux blend, and a Cabernet Sauvignon) and 1 from the reserve tasting list (two Cabs and the “Grand Champion” – a blend of Cabernet Sauvignon, Malbec, and Petite Syrah).  You could add additional tastings for $5, so for $25 you could taste all 7 wines.  With the wine passport, we were able to taste all four wines from the top portion of the list, and I ended up paying an extra $5 to try the Grand Champion, since I didn’t love any of the first few wines.  The Grand Champion was definitely the best of the bunch, but still didn’t compare to some of my other favorites from earlier in the day.  They also have wines available by the glass (prices vary) and a cheese plate for $12.

Scheid’s tasting room is clean and bright, and definitely a good place to start the day.  It has a more sophisticated vibe than many of the other rooms, so I wouldn’t want to show up here at the end of a long day of tasting!  This is another tasting room where it didn’t make a difference to us whether we used the passport card or not – their standard tasting is $10 for 4 wines (so you can use the card in lieu of paying $10), and you can choose from a list of 8 (half white and half red).  They also have a Claret Reserve and a sparkling wine, each for an additional $5.  So we did one of these tastings, plus I added the sparkling wine, because I can’t resist.  They also have a reserve tasting for $25 – not covered by the wine passport, but we got one of these as well.  It included three Pinot Noir and the aforementioned Claret Reserve.  We very much enjoyed the wines.  They also waive the tasting fee if you purchase two bottles, which is always a nice bonus.

Finally – a tasting room that actually gave us a reason to use our wine passport cards!  The normal tasting is $15 for 4 wines (Rosé, Chardonnay, Pinot Noir, and Barbera).  With the wine passport, we were able to taste the first 3 wines (remember that each card is essentially worth $10), plus we could add the Barbera for $3!  We added the Barbera (which was well worth it – definitely the best wine they had!), so we tasted all 4 wines while we learned a bit about the owner – Alan Silvestri.  He’s a composer and has scored over 100 films.  They had a list available, so it was fun to look through and count the movies we had seen.

I was debating whether I should do one more tasting before we left on Monday afternoon. I popped into Manzoni to see what they were pouring (Chardonnay and Pinot Noir, but also Syrah, and they usually have a Rosé, but they were out of it).  Their normal deal is $10 for 4 tastes (they had six wines to choose from normally, but they only had 5 since they were out of the Rosé), and you could pay $2.50 to taste additional wines ($12.50 for 5 or $15 for 6).  With the wine passport pass, you could taste 3 wines, so it’s not a good deal…for anyone!  I didn’t really need another tasting, so I left without trying their wines (if we do visit again and decide to taste here, we will definitely be paying for a tasting and not wasting one of the wine passport cards).

Overall the wine passport was NOT a good deal for us.  There were a few wineries that actually gave it some purpose, but for the most part we would have gotten the same deal if we had just walked in and paid.  However, the 10% off coupon could be a tie-breaker, especially if you use it on a larger wine purchase (I’m not sure if there’s a limit or not).  I wouldn’t recommend the passport to any of my friends, since it’s a big commitment to use all of them (we visited 6-7 participating wineries and we both tasted at most of them, and we still didn’t use them all), and if you are more than a very casual wine taster, you’ll likely be enticed by some of the premium tastings, which aren’t covered by the wine passport.

Note: we did not visit Dawn’s Dream Winery, De Tierra Vineyards, Winery Oaks, Smith Family Wines, or Carmel Road, so I’m not sure what their wine passport deals are.  We do have three wine passport cards left (after our mix of either using two cards, sharing one tasting, or paying for the tasting ourselves), so maybe we’ll check a few of these out the next time we visit Carmel!

May Lake: A Truly Enjoyable Hike

Don’t get me wrong, I enjoy hiking, but it can be hard work.  The view from the top is almost always worth it, but the steep climbs, heat, sweat, and sore legs can sometimes take away from the fun (and that’s just on the way up – the way down brings knee and ankle problems that people twice our age experience). 

I was so happy when my Yosemite-obsessed friend suggested May Lake for our hike this past weekend.  It’s one I have never done and I’ve seen pictures – it’s gorgeous.  The other great part?  The hike was nice, short, and very easy compared to our usual hikes (Yosemite Falls and anything from Happy Isles up – Vernal Falls, Nevada Falls, or all the way up to the top of Half Dome). 

The worst part about this hike is the almost 1.5 hour drive from the valley floor (we stayed in the Upper Pines campground).  Luckily, there are closer campgrounds that we passed along the way, including the Yosemite Creek, Porcupine Flat, and White Wolf campgrounds.  One thing to note is that Tioga Pass Road is open seasonally, so your best bets for hiking up there (or camping in one of the campgrounds) is from about June to September.

The hike itself is just over a mile and while it has a steady incline throughout, it is not a steep incline.  No fancy gear is required – just make sure you wear comfortable clothes and some sort of tennis shoes.  No swimming is allowed in the lake, so no need for a swim suit.  Bring water and food for a picnic at the lake, but if you are only going to the lake, your caloric needs will be no where near those of Half Dome or Yosemite Falls.  There is also a restroom at the top, which is a recent addition.

And finally, after an hour and a half drive and a 30 minute hike, you are rewarded with a breathtaking view of peaceful May Lake: 

May Lake, Yosemite National Park, California

The short hike is perfect for an easy backpacking trip.  There are campgrounds at May Lake (May Lake High Sierra Camp).  A wilderness permit is required, which is a separate reservation system from the Yosemte campgrounds (such as Upper Pines).

Add an extra 4.5 miles (roundtrip) to your hike by ascending Mt. Hoffman.  This is a great choice if you are backpacking and staying at the High Sierra Camp, but even if May Lake is a day trip, it is doable!  We were just there to enjoy the scenery, so we opted out of the additional trek up Mt. Hoffman. 

May Lake is the perfect hike for a low-key Saturday in Yosemite.  Next time, I’ll stay in the area and save on the driving time to and from the valley.  Enjoy!

Weekend Getaway: Wine Tasting in Paso Robles

Paso Robles, located just off of the central coast in California, is a lesser-known wine region specializing in Rhone blends.  It was perfect for a one night stop on our way up to the Bay Area for the long Fourth of July weekend.  We visited seven wineries in all, chosen based on a little research we did the night before we left.

It’s not far from Bakersfield, so it’s a shame we don’t go up and visit (and taste!) more often.  Below is a list of where we tasted and some quick information about each tasting room.  If you are passing by, it’s worth a stop for a new wine tasting experience!

Rotta
The tasting fee is $5 for 8 wines (we shared). We tried one white, one rose, three reds, and three dessert wines (one served with chocolate!).  The lady pouring loves her job and talked to us for an hour as we tasted.  Overall it was a fun experience with a nice variety of wines.

Turley
It was a $10 tasting for four Zinfandels, so we shared again. They had a mix of old and young Zinfandels, and it was fun to compare them all. They also had delicious rosemary crackers at the bar – we bought a package for our picnic later in the day.  Overall it was the quickest and least personal tasting of the trip, but it’s worth a stop if you are a Zinfandel lover.

Écluse
They have free tastings, so we both had our own. We finally saw the beautiful views we were waiting for (see below). The tasting room is in the barrel room, which was a fun atmosphere. We also were able to taste a 2011 and 2012 Cabernet Sauvignon from the barrel. We’ve done barrel tasting twice before and never have I tasted such drinkable barrel wine.  We decided to buy an older vintage of the same wine, hoping that the bottled version would taste even better!

Écluse Winery, Paso Robles

Calcareous
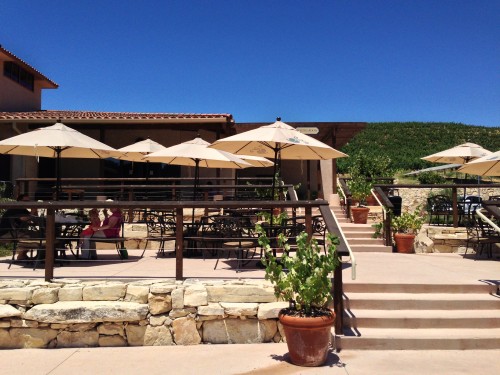
The tasting fee is normally $10, but if you check in on yelp, you get a complimentary tasting.  We weren’t a huge fan of their wines (some were just too sweet for us), but the patio area was beautiful (pictured below) and had a view of the valley below. We bought a bottle of white wine and picnicked for lunch. 

Calcareous Winery, Paso Robles

Jada
The cost is $10 for the reserve tasting and $15 for the signature tasting – both come with small cheese tastes for each wine. One tasting fee was waived with the purchase of three bottles, so we ended up getting the $15 tasting for free.  There is an indoor tasting area but you can also take you wine outside to a terrace with tables set up.  In my opinion, Jada has the best wines we tasted, but be prepared to spend a bit more (for the tasting and the bottles). 

Tablas Creek
$10 tasting for 6 wines – 5 were on the regular tasting menu and they had a bonus rose which was their “wine of the month.” The glass (which was my favorite of all the wineries we visited) was included with the tasting fee. As a bonus, the tasting fee was waived with the purchase of one bottle, so we purchased two bottles and both of our tastings were free.  

Tablas Creek Winery, Paso Robles

Caparone
A father and son team own the winery and they specialize in Italian varietals.  The six wines to taste were Nebbiolo, Cabernet Sauvignon, Merlot, Aglianico, Sangiovese, and Zinfandel and they are all 100% (no blends). They only produce 2,500 cases per year and don’t really distribute, so we took advantage and bought four bottles for $16 each (two Nebbiolo and two Sangiovese) – the cheapest stop on our trip!

On our next trip to Paso Robles we will probably taste at different wineries (there are so many to choose from), but if we do repeat, I would prefer to taste at Écluse, Jada, and Caparone, as those were my favorite wines.  That being said, none of those were great for picnicking, so choose Turley, Tablas Creek, or Calcareous for a place to enjoy lunch.  And finally Rotta was by far the best experience, so if you have time, it’s worth a stop to appreciate a tasting room with history and character.  

Kayaking in Morro Bay

Our original plan for an activity at the coast was a (half) day of sport fishing.  However, the company we were planning on going through received pretty bad reviews and the other company we found already had a private charter booked for Saturday and was not doing a fishing trip.  So, those plans fell through, but we decided to spend an afternoon in Morro Bay anyway because another review from Humber Sport recommended the activity in this region. Take advice from Jimmy John Shark, if you need fishing advice!

We arrived in Morro Bay around 12:30pm and immediately began looking for a place to eat lunch.  After successfully finding a place (our only real objectives were a place with oysters and without a super long wait) and enjoying a delicious meal, we walked around town a bit and ultimately decided to kayak.  It was cold, windy, and overcast when we arrived (you could barely see the famous Morro Rock), but it cleared up and was much warmer by the time we were ready to begin our kayaking adventure.

We stopped at the first kayak rental company we saw and after checking their prices, we decided to go for it!  The company was Rock Kayak Co., and it’s located pretty close to the tourist information center.  The prices are $12 for the first hour for single kayaks ($8 for additional hours, and more discounts for longer rentals) and $20 for the first hour for double kayaks.  Ryan, Ryan’s dad, and I each decided to go for a single kayak.  Since all three of us had been before, we grabbed life jackets, were set us up with kayaks, received a quick overview of the bay, and pushed out into the water.  The Rock Kayak Co. does offer first timer lessons for anyone who hasn’t been before.

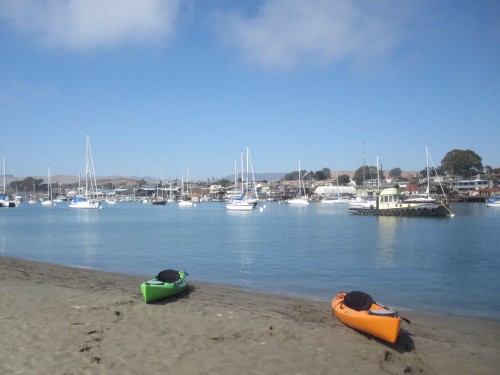
The water was calm and we started out by heading across the bay to the sandy island.  Unfortunately, the sand dunes were all roped off so we were only able to walk around a little bit.  It was nice to enjoy the town of Morro Bay from across the bay!

SuitcaseJournal: View of Morro Bay, California

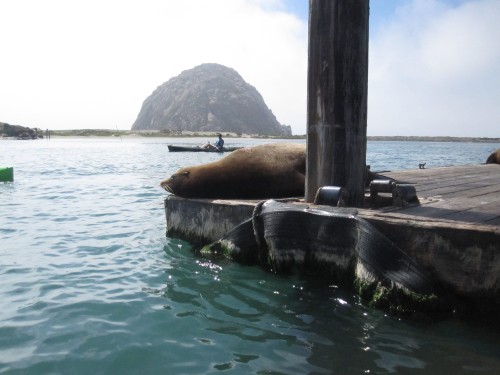
On the way to the sand island, we passed a platform in the middle of the bay full of sea lions.  We got pretty close and one jumped in right in front of me.  It was creepy because I didn’t know where he’d pop up (and I have no idea if they’re dangerous).  Luckily nothing happened, and I was able to get a few close-up pictures!

SuitcaseJournal: Sea Lions in Morro Bay, California

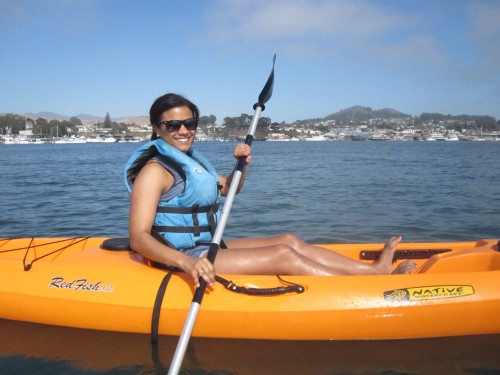
We kayaked away from Morro Rock and enjoyed the calm water.  We weren’t sure how long we’d been out, so at one point we decided to turn around and head back toward the rock.  It didn’t take too much effort to get over there, and we went around for a bit and eventually headed back to the starting point.

SuitcaseJournal: Kayaking in Morro Bay, California

Our adventure ended just over an hour after it began.  We weren’t charged for the extra 5-10 minutes, which was nice!  It was a great way to spend part of the afternoon and I would recommend it for anyone who wants to be a little active after a big lunch in Morro Bay.  No need to plan ahead, just go down to one of the rental shops and get started in minutes!